
SOURCE AND DESTINATION
We are going to import data from an Excel sheet and load it into a database table. Let’s have a look at the current state of our sheet and table first.

The sheet is populated and the database table is empty.

At the end of this tutorial, you’ll see that the table will
become populated with the data from Excel sheet.
THE PROCESS
Make sure to install SQL
Server Data Tools (SSDT). You can check the available versions here.
The UI looks like Visual Studio.
Go to File at the top left corner and click on it. Go to
File – New – Project

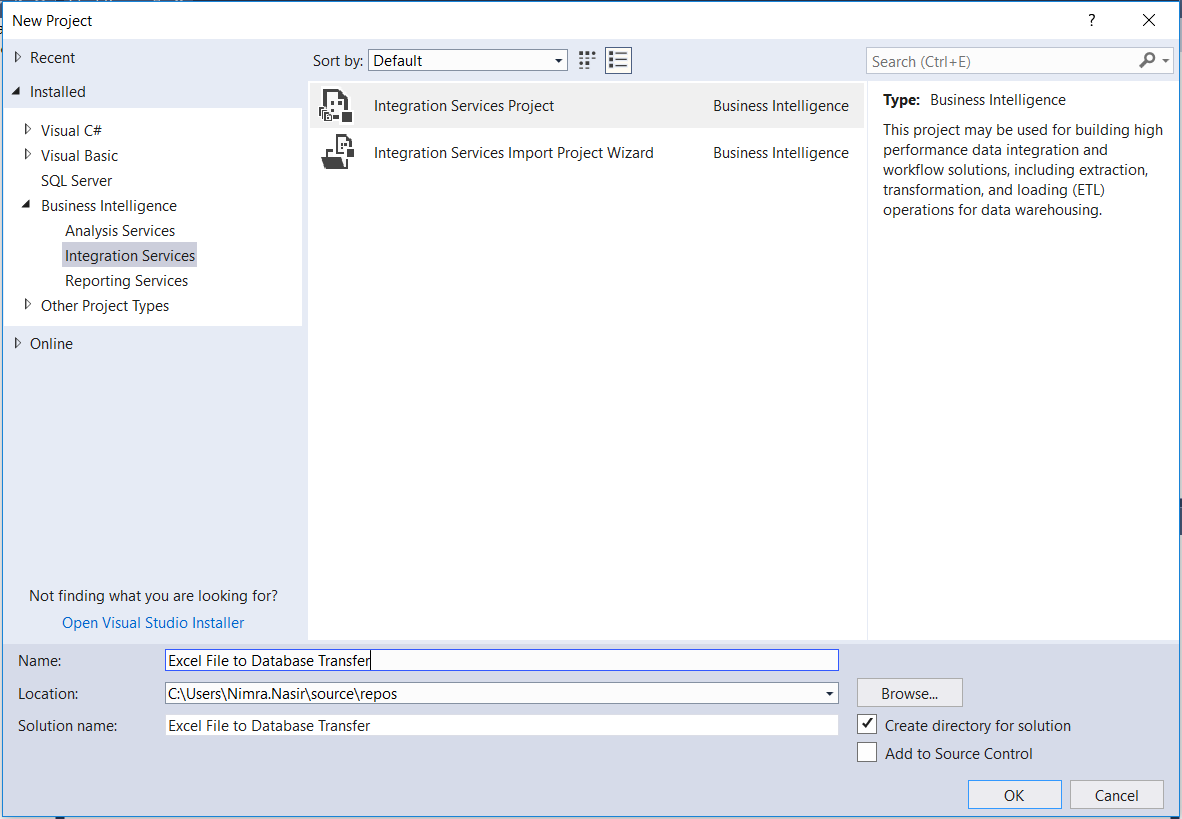
A new window will open. From the left panel, go to Installed
– Business Intelligence – Integration Services and select new Integration
Services Project. Give it a name and location accordingly. Then Click OK.
After clicking OK, your screen will look like this:

Drag and drop ‘Data Flow Task’ from left panel (called SSIS
toolbox) into the empty area.

Double click on this the data flow task widget

Another empty canvas will open. You may notice that the ‘Data
Flow’ tab from the task bar is now selected.
In this empty area, drag and drop ‘Excel Source’ that comes
under the ‘Other Sources’ area from the sidebar.

Right click on ‘Excel Source’ widget and click ‘Edit’.

A new window will pop up that would look something like
this:

Now create a new connection manager. Click on the ‘new’
button located on the right of ‘Excel connection manager’ textbox.
This screen will pop up.

Click browse to select the path where you have placed your
excel file. After successfully choosing the path, click OK to close the pop up
screen. You will be redirected back to the previous screen. Here, you need to
select the specific sheet in the excel file from where you want to import the
data.

Click OK. Your source is now all configured.
Now select ‘ADO NET Destination’ from ‘Other Destinations’
and drag it onto the canvas as well. You may have noticed two arrows getting
out of ‘Excel Source’ widget. Select the blue arrow and connect it to the ‘ADO
NET Destination’ widget.
It will look like this:

Now right click on the ‘ADO NET Destination’ widget and
click on ‘edit’ to open the following window.

Click on the ‘new’ button located on the right of
‘connection manager’ textbox to open this window.

Again click on ‘New…’ button from the bottom right to open
yet another window.

From server name, you can select
your desired server. If you are working with your local server like me, you can
just write a full stop (.) in the text filed. Keep the authentication type set
to ‘Windows authentication’.
From the ‘Connect to Database’,
choose your desired database. The screen will now look like this (I’m importing
data to a database named ‘Practice’. You can choose your own destination
accordingly).
Test the connection from the left
bottom button to make sure connection is established successfully.
Click ‘OK’ to go back to the previous
window. Click ‘OK’ again to get back to the first window. From here, select
your desired table where you want to export your data.

In the mapping tab, make sure your source and destination
columns are mapped correctly.

Click ‘OK’ to go back to main screen. Now you’re good to go.
Click on the ‘Start’ button from the top banner to start your transfer.

The package will execute and transfer the data from excel to
specified database table.

The above image specifies that 10 rows have been transferred
from Excel to database. Let’s see our results now.
Our database table which was previously empty is not
populated with all the data from the specified Excel sheet.

Comments
Post a Comment